
Are you tired of dealing with a leaky or broken shower handle? Don’t worry, replacing a shower tub handle is a relatively easy DIY project that you can complete in less than an hour with some basic tools and a new handle kit. First, turn off the water supply to the shower and remove the existing handle by unscrewing it from the valve stem.
Next, take out the old cartridge and replace it with the new one included in the handle kit, making sure it’s a good fit. Then, reattach the new handle by screwing it onto the valve stem and turning on the water supply to check for leaks. With just a few simple steps, you’ll have your shower working like new again in no time!
Preparing for the Project
Before you start removing your old shower handle, there are a few things you’ll need to gather together:
Tools Needed
- Screwdriver – You’ll need a Phillips head and a flat head screwdriver to remove the old handle and install the new one. Make sure they are the right size for your hardware.
- Adjustable wrench – Helpful for loosening nuts and removing fixtures.
- Teflon tape – Used to wrap pipe threads to create a waterproof seal on the new valve.
- Rag – To clean up any small drips or messes.
- Bucket – To catch water when removing valve stem.
Materials Needed
- New shower handle kit – Purchase one that fits your faucet type from a hardware store. Make sure it comes with all the necessary parts.
- Replacement cartridge – May be needed if yours is worn or damaged. Match it to your faucet brand.
Turn Off the Water Supply
Before starting any plumbing work, it’s crucial to locate the shut-off valves for your shower and turn them off. This preventative step ensures that water won’t gush out unexpectedly when you begin removing parts. Take a moment to explore how to replace bathtub faucet handles; this knowledge will guide you through the process of disassembly and reassembly. Once the valves are off, test the water by briefly turning on the shower to confirm that it is fully shut off. This precautionary measure not only avoids potential mess but also contributes to a smoother and more controlled replacement process.
Prep the Work Area
Lay down towels in the tub under where you’ll be working to catch any drips or drops. Have a towel on hand too. Make sure you have good lighting and ample room to work. Clear away any bottles or accessories.
Removing the Old Shower Handle
With your supplies gathered and water turned off, you’re ready to remove the old shower handle. Follow these steps:
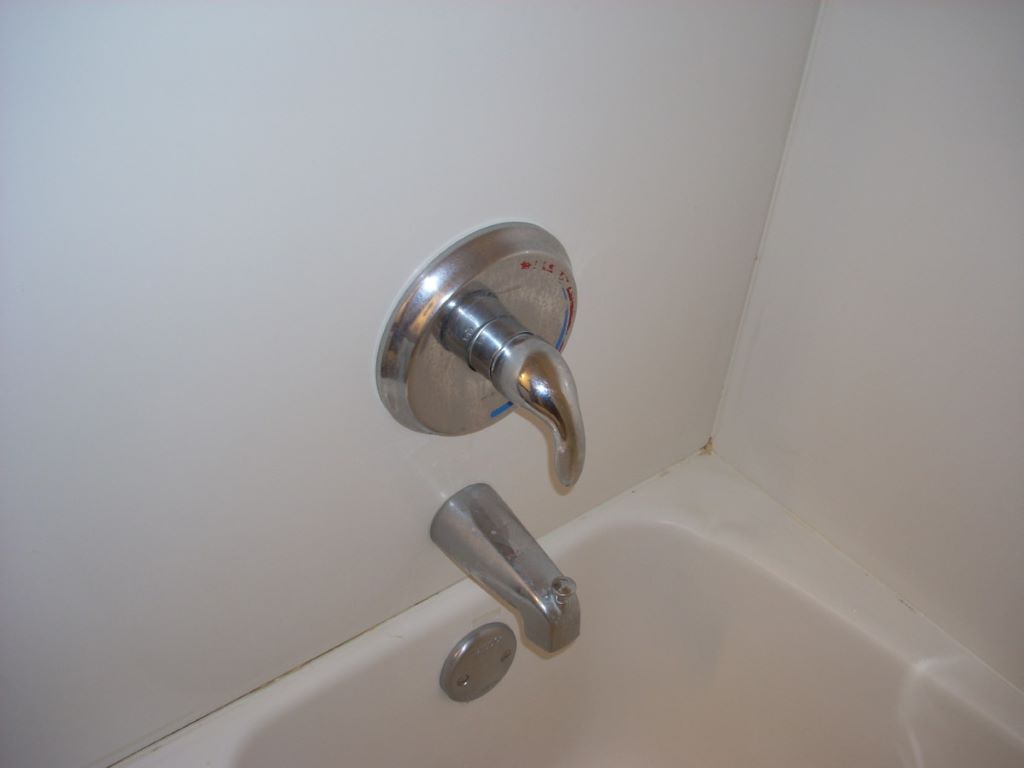
Take Off the Decorative Cover
The handle cover hides the screw that attaches the handle to the valve stem. Pry off the decorative cover with a flat screwdriver. You may need to wiggle or twist it to break the seal.
Remove Handle Screw
With the cover off, you’ll see a screw in the center of the handle base. Unscrew it with your Phillips head screwdriver and set it aside.
Detach Handle from Stem
The handle will now be loose. Wiggle it gently from side to side while pulling it outward to slide it off the valve stem. Place the old handle aside.
Take Out Retainer Nut or Bonnet
Look for a large retainer nut around the valve stem. Turn counterclockwise with your adjustable wrench or channel locks to detach it. Remove any washers as well.
Remove Valve Stem
Unthread the valve stem by turning it counterclockwise. Have your bucket ready to catch any water still in the pipes. Take note of the stem’s length for the new one.
Inspect Parts for Damage
Examine the valve seat inside the faucet body and the washer/cartridge unit. Look for cracks, wear, or breakdowns. Replace the cartridge if needed.
Installing the New Shower Handle
Once all the old parts are removed, you can start installing your new shower handle kit:
Install New Cartridge
If you need a new cartridge, insert it into the faucet body making sure the channels line up with inlet pipes. Grease the o-rings first for an easy fit.
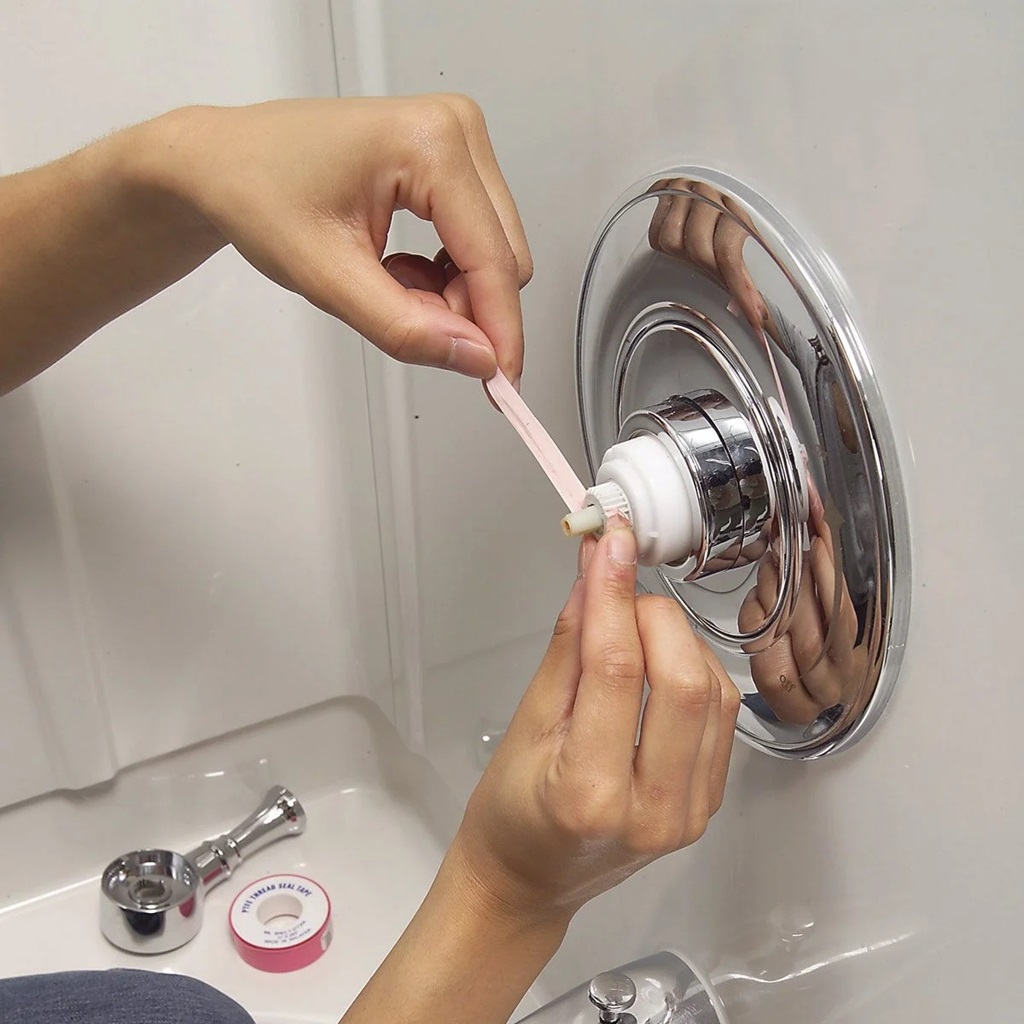
Attach New Valve Stem
Wrap the new valve stem threads with Teflon tape and screw it into the cartridge/faucet body. Tighten with your adjustable wrench.
Replace Retainer Nut and Washers
Put back on any washers that fit over the valve stem, then thread on the retainer nut. Tighten with your wrench until snug.
Mount New Handle
Slide the base of your new shower handle over the valve stem aligned straight.
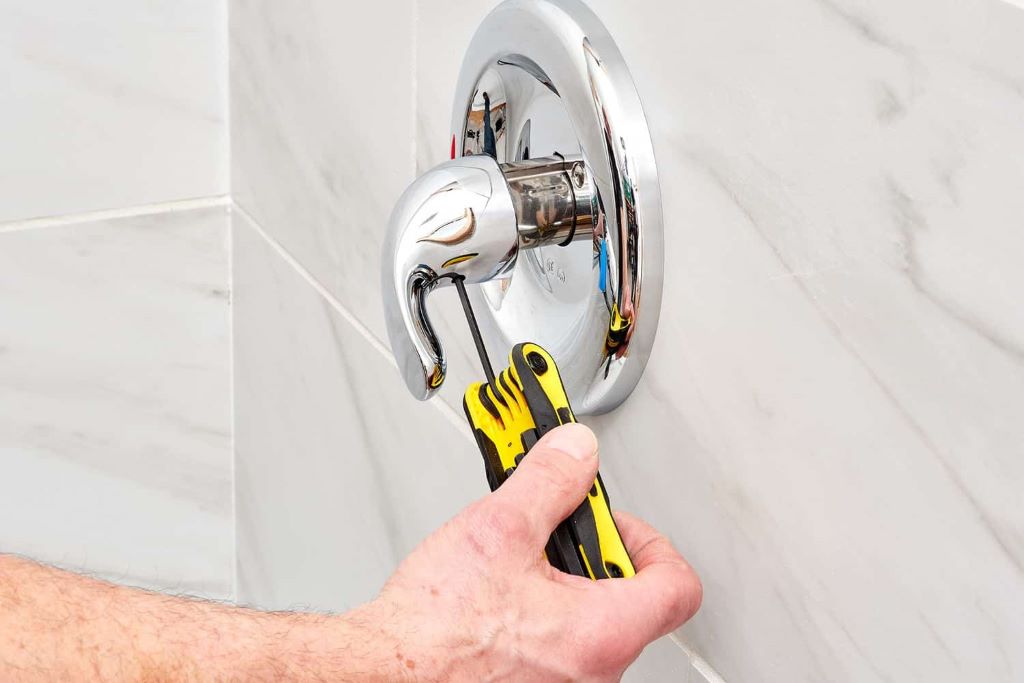
Secure With Handle Screw
Tighten the small handle screw through the base into the stem to hold it in place. Don’t over tighten.
Replace Decorative Cover
Pop the handle’s cover back into place over the screw hole. Make sure it’s on tight.
Turn Water Back On
You’re almost done! Turn the water supply back on and test out your new shower handle. Turn to hot and cold to check the temperature regulation and pressure.
Check for any leaks at connections and tighten if needed. Let the shower run a few minutes to clear any debris.
Adjusting the New Shower Handle
If your new handle feels loose or stiff, you can adjust it:
- For a tighter feel, remove the handle and tighten the retainer nut 1/4 turn with your wrench. Re-install handle.
- For a looser feel, loosen the nut 1/4 turn and re-install.
Test the shower handle operation again after adjustments. You want the handle to move smoothly and easily, without being too loose.
Troubleshooting Common Problems
If your newly installed shower handle isn’t working right, a few fixes can get it back in order:
Handle is loose: Tighten the handle base screw or the retainer nut.
Water leaks: Tighten connections, replace valve stem o-rings, or re-wrap pipe tape.
Water doesn’t turn off completely: Replace cartridge or valve seals.
No water flow: Ensure the water supply is on. Replace cartridge.
Water temperature fluctuates: Clean cartridge, replace if worn.
Don’t hesitate to call a plumber if you can’t resolve the issue and need professional assistance.
Caring for Your New Shower Handle
With your shiny new handle installed, just a few maintenance tips will keep it looking great:
- Wipe down weekly with a soft, damp cloth to remove minerals and soap buildup.
- Apply wax to metal handles to protect the finish from corrosion.
- Replace washers or o-rings when they become worn to prevent drips.
- Consider water softener if you have hard water which can damage parts over time.
- Call a plumber immediately if you notice any persistent leaks or issues.
Frequently Asked Questions
What type of new shower handle do I need?
Match your new handle to the existing shower valve you have. The most common are ceramic disk, ball, cartridge, and compression valves. Purchase the corresponding handle kit.
How do I remove a stripped shower handle screw?
Use a rubber band between the screwdriver and screw to get a better grip. Or carefully drill it out and replace with a new screw.
Can I change my shower handle style or finish?
Absolutely! As long as you get the right handle to fit your valve, you can update the style and finish to match your bathroom decor.
What should I do if my shower valve is corroded?
Corroded valves likely need to be completely replaced. Call a professional plumber who can inspect and replace the valve and pipes if necessary.
How often should shower handles be replaced?
Old or leaking handles should be replaced right away. Otherwise, shower handles and valves can last 15-20 years with proper maintenance.
In Summary
The key steps to remember when replacing a shower tub handle are:
- Turn off the water supply and prep the work area
- Remove old handle assembly including cover, screw, stem, and bonnet
- Inspect parts and replace cartridge if needed
- Install new cartridge, valve stem, seal washers, and retainer
- Mount new handle base and tighten screw
- Turn water back on, test new handle, and make adjustments
- Maintain the finish and inspect for leaks periodically
Much like replacing a shower handle with the right tools and kit, understanding whether a garden tub is a Jacuzzi requires careful consideration of specific features. Take your time to examine the jets, functionality, and design – before you know it, you’ll be soaking in the luxurious relaxation of your own upgraded oasis.